Porto by Smartwave is one of the top selling themes, and of course if you want to get up and running in less than ten minutes the only way to go is via aMiSTACX. We not only do we make it easy, but we make it so it just works.
We have a lot of our customers using the Porto theme, and it’s about time we shared our secret on a successful install on one of our Magento stacks.
Note: Porto installation has not changed since this article was written, and applies to Magento 2.2.x+
First we will use our Magento 2.2.x LAMP. At the time of this article, the new Porto release 3.0.6 for Magento 2.2.4 was just way too new, so this article will focus on Porto 3.0.4 on Magento 2.2.x.
After you acquire both the zip files and the Smartwave Porto license, it’s time for the actual install.
Step 1. Unzip to local and upload via SFTP directories app and pub to /var/www/magento/
Step 2. Upload Patch app directory designated as “Patch for Magento 2.2.x” to /var/www/magento [Upload app directory only.]
Step 3. Upload mystery child theme. Yes! You want to set up a child theme. You need to download it and upload it to the server.
To here: /var/www/magento/app/design/frontend/Smartwave
So that it looks like this when you are finished:

Step 4. Finish install via CLI. [This assumes 100% fresh new install of Magento 2.2.2 on aMiSTACX. I mean virgin.]
cd /var/www/magento
sudo ./amistacx.sh # This is a script found in /magento/ make “x” rename, and executable if required.
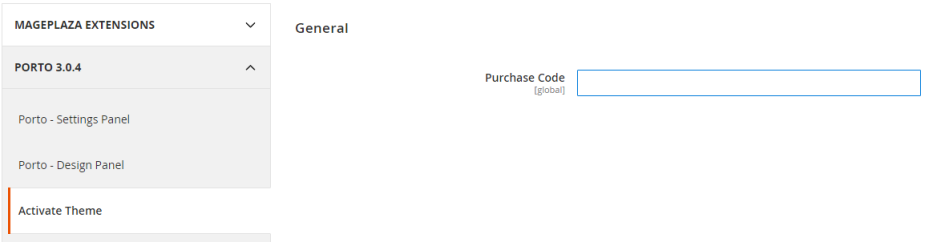
Step 5. Purchase License Code from Smartwave & activate theme
https://themeforest.net/downloads
5.B. Magento Admin Panel: Porto >> Activation
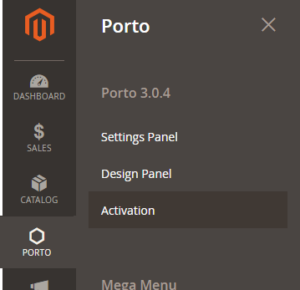
Like so…
Step 7. From Magento Admin Console set Porto Child Theme:
Content >> Configuration

Tip: Set your store in Single-Store Mode if you are NOT using additional views.
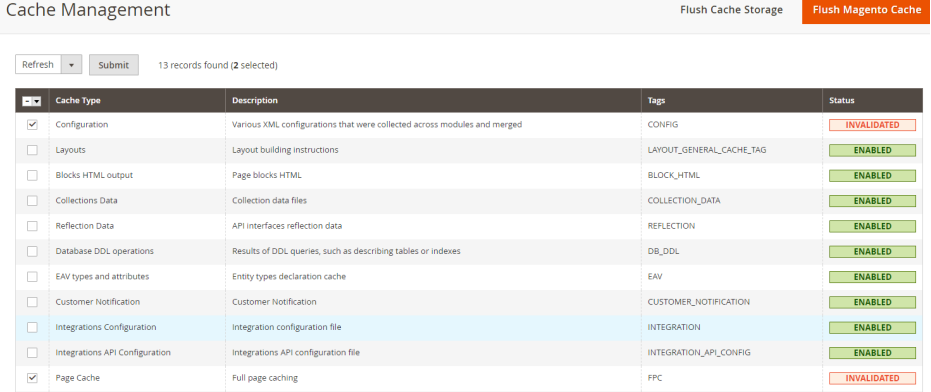
Step 8. Flush System Cache as prompted:
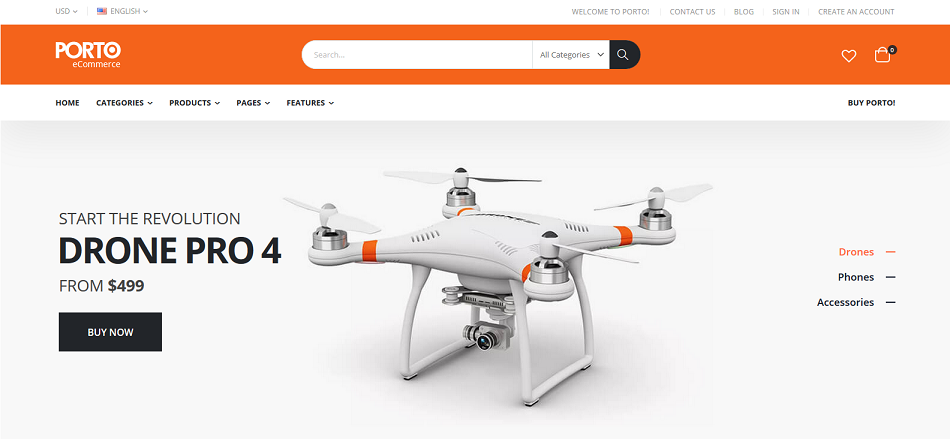
Step 9. Success!
Yes! It’s that simple with aMiSTACX. Up and running in minutes 🙂