How to make a full image backup of your aMiSTACX EC2 server.
This is one of the simplest methods and most convenient backup methods you’ll ever encounter when working in a development or test environment. Although you can use the same method for production, you need to keep in mind once an AMI image kicks-off it will drop all connections to the server being imaged. The time it takes is proportional to the size of the image, and factors in the delta between images.
If new to AWS or with experience, I’m sure you’ll appreciate the value offers over just about every hosting company on the planet with the ease of backup and restoring a server. Seriously! This is worth the extra expense due to the convenience and time is money.
Hopefully, if you are new to AWS and you just built your aMiSTACX server, you will heed these instructions, and make a full backup using this process. It will become very helpful when you may require a full restore point.
With the AWS create image, you are creating an Amazon Machine Image [AMI] of your EC2 server. This method is superior in many ways of just backing up an attached volume [snapshot] as you can easily copy or transfer this AMI across AWS Regions and Availability Zones, and mount it again as a full live EC2 carbon copy of the source! [For Nitro Class EC2s this avoids extra steps in a restore.]
Full Image Backup of LAMP/LEMP
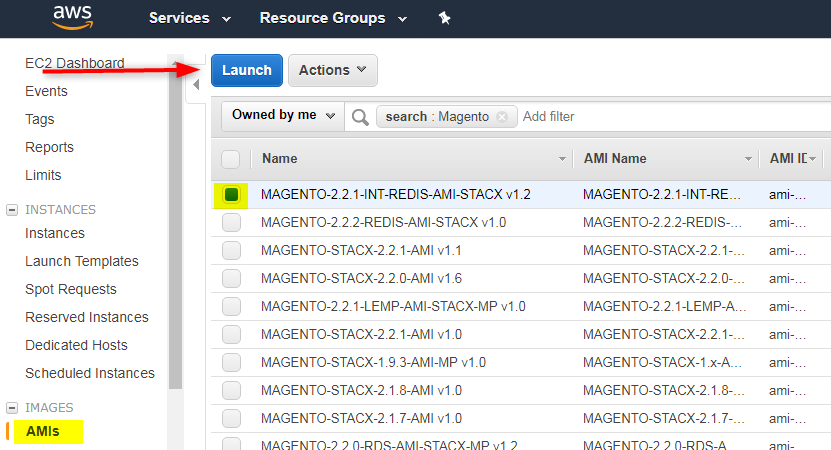
Step 1. From the AWS EC2 console tick the server you want to image, and from the actions menu select “image” >> “create image”
Step 2. – Use a unique name for your image, and it is very helpful to provide a detailed description.
TIP! An example would be let’s say you are installing Magento modules, you want to take an image before module X, and then after module X. GIT works great for rolling back files, but you have to understand GIT does not track database schema changes out-of-the-box. Hence, using the snapshot method is a superior and quick way to roll-back if something goes wrong on a module install. [And how many times has that happened?]
Step 3. – As soon as the image starts, you can click on the AMI link on the left-hand side of the AWS console, and watch the progress. Take the opportunity now to make sure you copy the AMI image name to the name in the AMI that is currently being built. [In the A51 dashboard this is done for you.]
Make sure you do exactly the same for the Snapshot. What we normally do is copy the image name in two other places: AMI and Snapshot. This way the image name and description are consistent.
Step 4. – As soon as the AMI image completes you’ll be able to connect to the server again, and also be able to mount the new image should you choose.
Restores
To mount your AMI [Restore to back to that point in time you took the original image.] is as simple as selecting the image and launching it. That’s basically it.
TIP! Avoid the use of hard coded IP addresses and use an elastic IP whenever possible. This way you can bring your image back up in a working condition.
TIP! Now is a great opportunity to increase the volume size.
Weaponize your Business with aMiSTACX!