Important! Make sure you have the latest WinSCP and Putty clients; otherwise, Ubuntu 22 will flag an SSH key error. Post upgrade you will also need to flush the session cache using the client’s tools. You can validate your keys with the AWS SSH connect.
How to connect to an aMiSTACX deployment on AWS.
Even those very experienced we have come to realize connecting to AWS isn’t as easy as AWS guides lead you to believe. So we are providing this brief tutorial to help you connect to your AWS EC2 aMiSTACX in minutes! Please follow these simple steps and you are golden!
Tip! If you are lucky enough to be using a Windows OS, then use WinSCP for both SFTP and Putty.
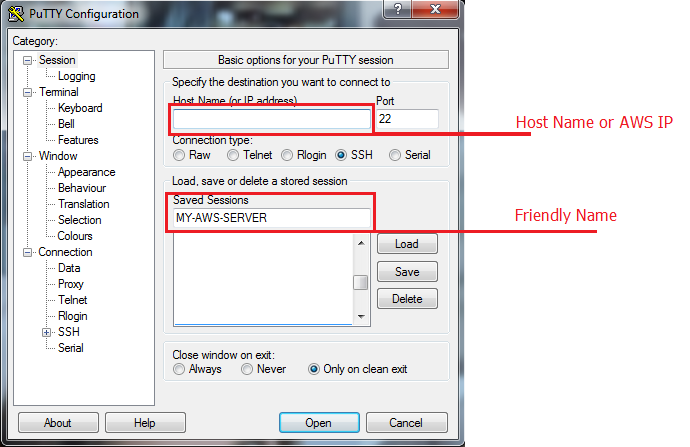
2. Get your Public AWS IP address, Elastic IP [EIP] or Public IP, and post it in the putty Host Field as above image shows.
3. Add a Friendly name to your new session.
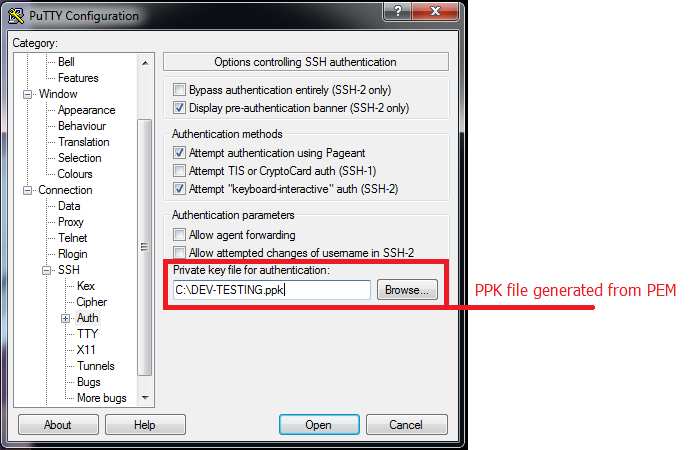
4. Click on SSH and then Auth [Shown in image above.]
5. Browse to your PPK file that you created with the Putty Key GEN utility. This is extracted from your AWS PEM file.
6. Scroll back to the top of the menu, and click “session” again.
7. Click “Save” to save your session!
8. The connection uses the default ubuntu user named ubuntu.
You are now finished, and you can now SSH to your aMiSTACX server.