S3 Titanium for WordPress Guide & Performance Tips
The S3 Titanium Plugin for WordPress by aMiSTACX is designed to put WordPress into a stateless or semi-stateless configuration. This means all components such as WP Media and Static content are hosted from AWS S3, and the database resides on an AWS RDS instance.
This configuration puts the architecture of WordPress into a true 3-Tier design that will allow true on-demand scaling – vertical and horizontal, and will allow the use of advanced high availability [HA] architecture such as AWS auto scale groups.
Note: Our plugin and this stack is designed for individuals with advanced technical ability, and have experience with AWS infrastructure and cloud technology.
Note 2: For best results, it is suggested to build your site from new, and/or to make sure your theme can handle the S3 deployment. Some themes [that are built correctly] offer seamless integration with our plugin, others require modification.

Plan Ahead : DNS
Fixing: Serve the following static resources from a domain that doesn’t set cookies:
You cannot disable cookies on resources served through CDN Cloudflare. While some speed recommendations will suggest eliminating cookies for static resources, the performance implications are extremely minimal. Cloudflare cookies are also required so security features work properly.
Tip. You need to have Cloudflare S3 CNAME set to CDN ON [Orange Cloud]. If you do not, then you will get mixed content warnings. Also make sure the S3 domain that Cloudflare is using has the Cloudflare SSL set to FULL.
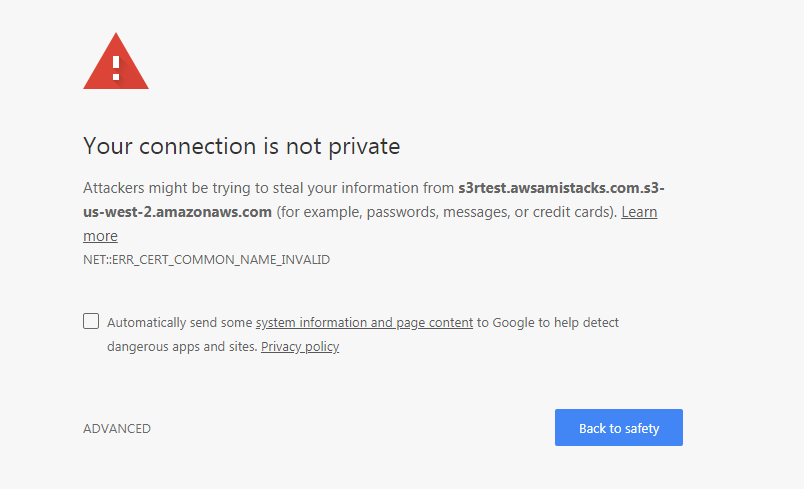
When Cloudflare CDN has not fully propagated, you will get served a URL that looks like this:
Plus you will get certificate warnings.
Tip. Static Content Deployment to S3
You have the option to deploy static content. If this option is enabled, please disable Apache PageSpeed Module and Redis. A/B test with any local caching engine. Everything will be served through S3 and the CDN will cache everything and serve at the edge.
WP S3 Titanium Configuration
The AWS Keys
Step 1. IAM S3R-Alpha KEY CREATION
These keys will be used to connect and manage S3 buckets from the S3R-Alpha module. Go to the AWS IAM console, and create a user with programmatic access, and attach the AmazonS3FullAccess policy to the account. Copy both keys and keep them in a safe and secure place.
A. Create user and assign Programmatic Access
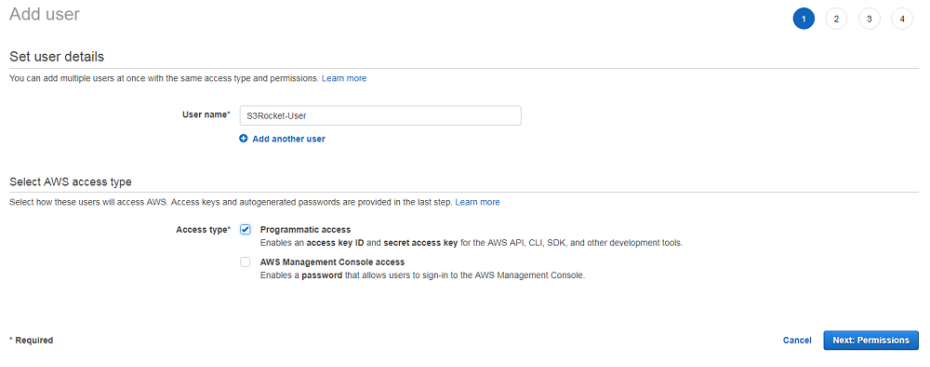
B. Select Attach existing policies directly, enter S3 to filter results, select AmazonS3FullAccess
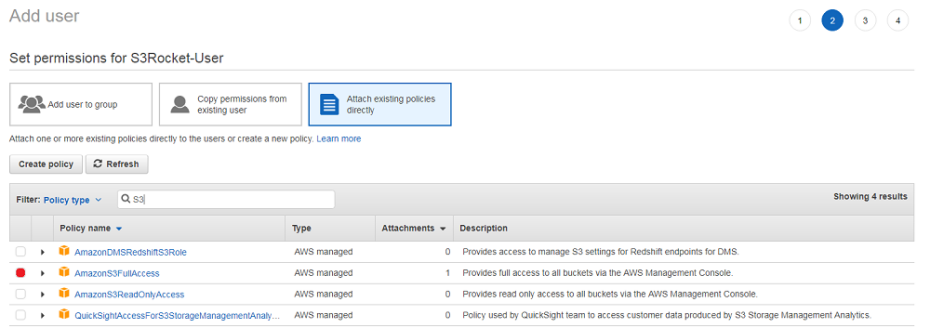
C. Review & Create user
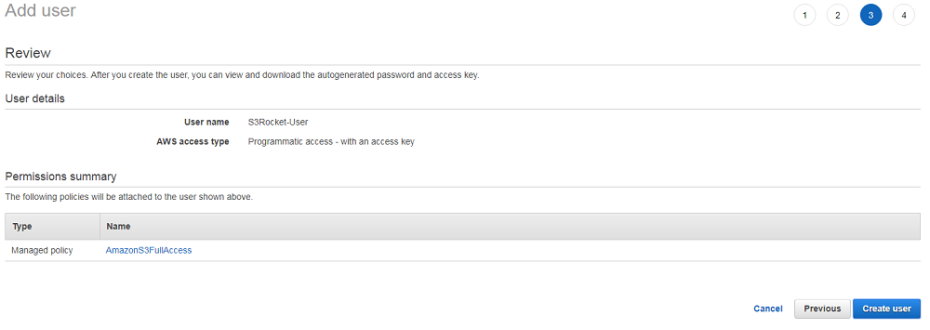
D. Copy and Download a set of the S3 IAM access Keys

Step 2. IAM S3Sonic KEY CREATION
These keys will be used to connect and manage RDS instances from the S3Sonic Module. Go to the IAM console and create a user with programmatic access.
E. Create user and assign Programmatic Access
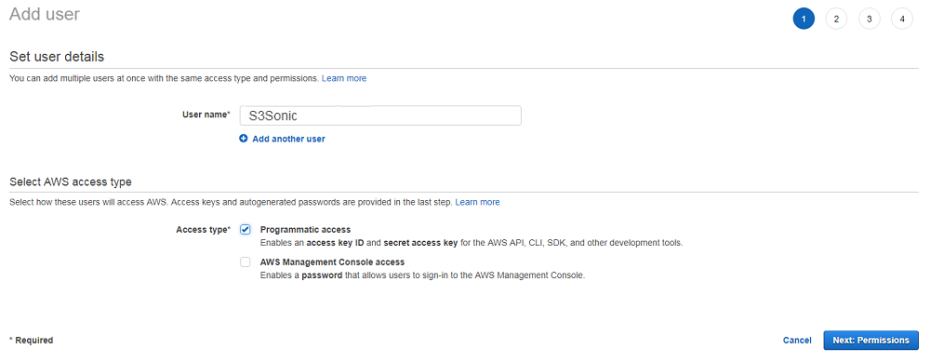
F. Select Attach existing policies directly, enter RDS to filter results, select AmazonRDSFullAccess

G. Review & Create user.
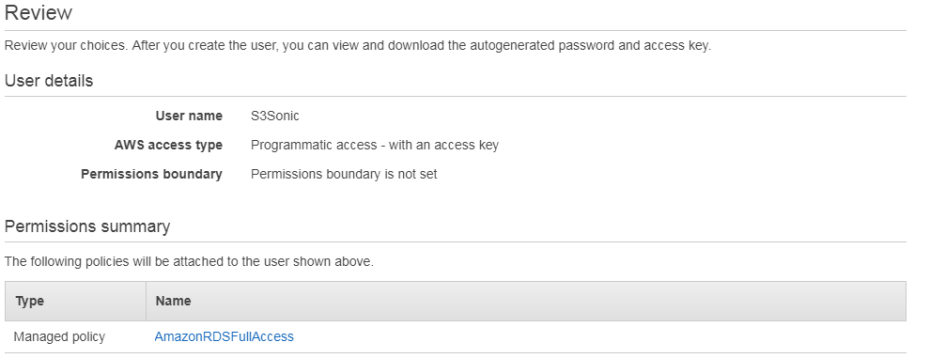
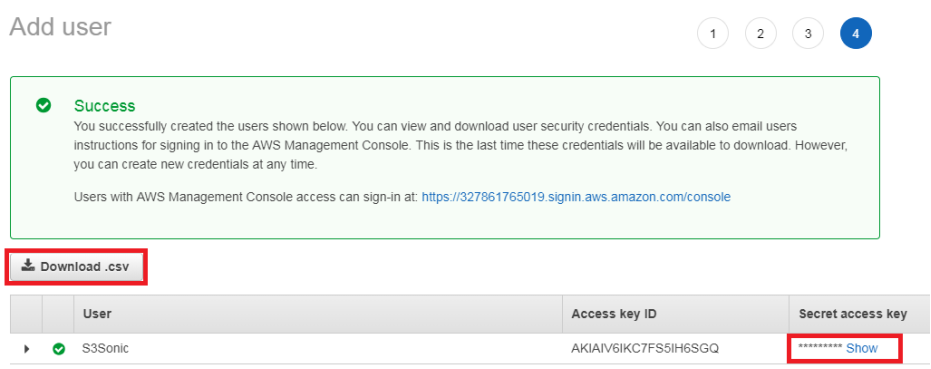
H. Copy and Download a set of the S3Sonic IAM User access Keys
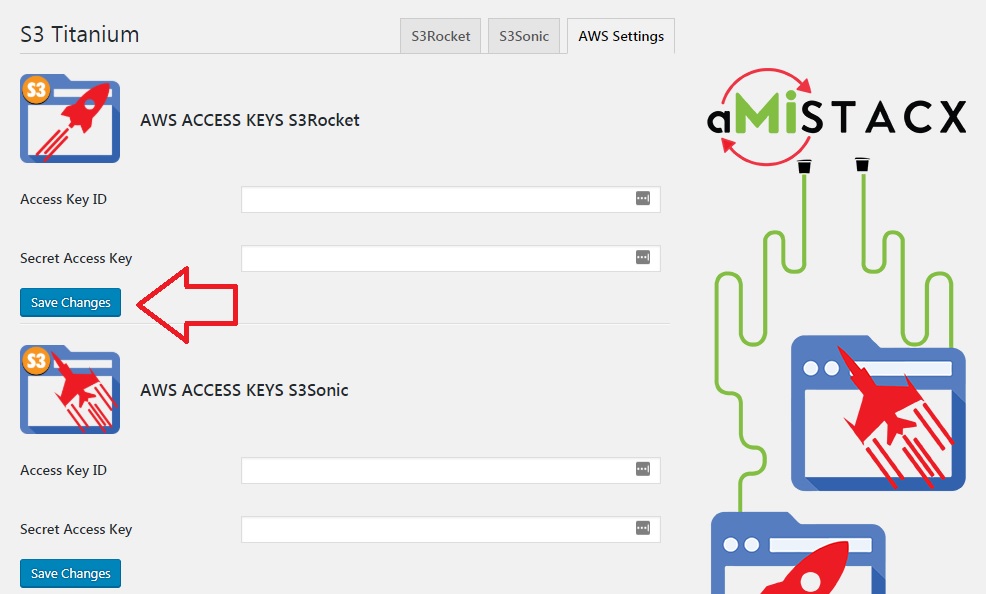
S3T AWS KEY TAB
After activation of plugin, enter the keys into the appropriate sections to the AWS Key tab. If you are not going to use S3Sonic or S3R-Alpha, then there is no requirement to enter any keys in that module section. It makes for better security. Use only what you need, and disable and remove the module if you do not intend to use it.
Tip: If you have a lot of image files to sync to S3 temporarily use a larger EC2 or RDS Database instance. This is because every URL will be re-written in the database.
Note: There are two separate “save” buttons!
Note: If keys are NOT entered, the specific module tabs will be locked.
S3R-Alpha TAB
Step 1. Decide to use an existing* bucket or create a new bucket. Make sure if you create a new bucket that the S3 Region matches the region-zone where the EC2 server resides.


After you create or select a bucket, all the tab’s options will show. Most of the common defaults are enabled.
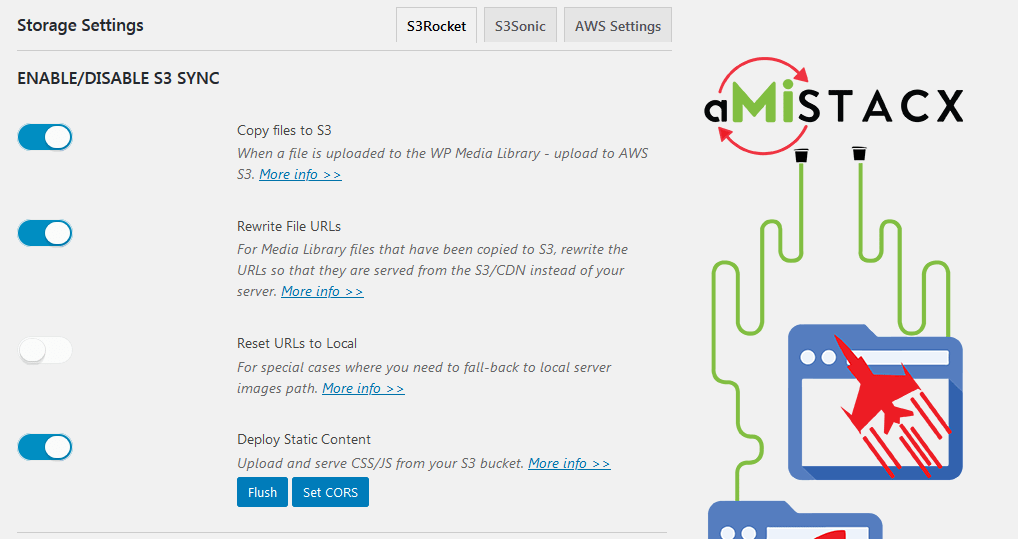
Static Content Deployment [Optional] – This will upload and server CSS/JS content from S3. It is best to make sure you are either building your site from new, or to make sure your theme can handle the deployment. Some themes [that are built correctly] offer seamless integration with our plugin, others require modification. The static flush feature will clear and initiate a re-sync.
Note*: For legacy S3 buckets using S3R-Alpha and static content deployment use the fix CORS feature to set the bucket permissions.
Step 2. If you are using a custom Domain [recommended] then enable the feature and enter the domain or subdomain. Normally you would want to flag it as a subdomain for tracking purposes, e.g., cdn.example.com or s3r.example.com or even s3.example.com.
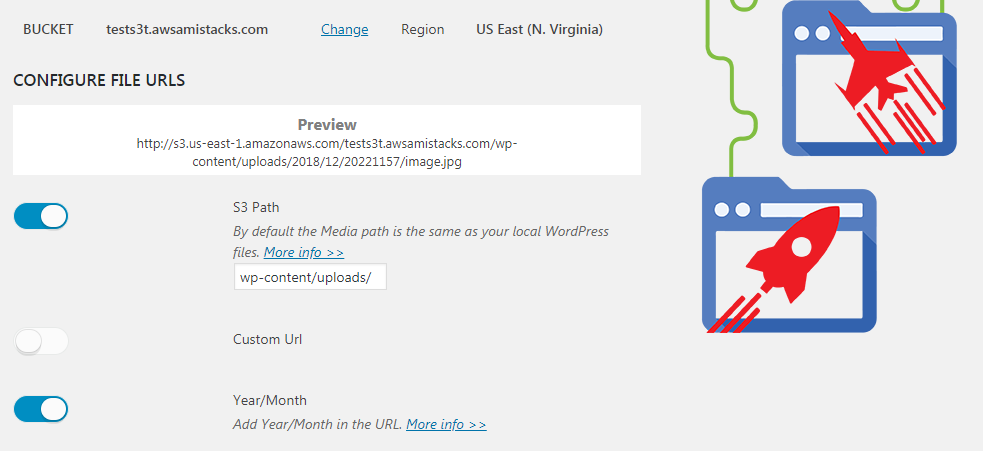
As shown with my example domain: tests3t.awsamistack.com
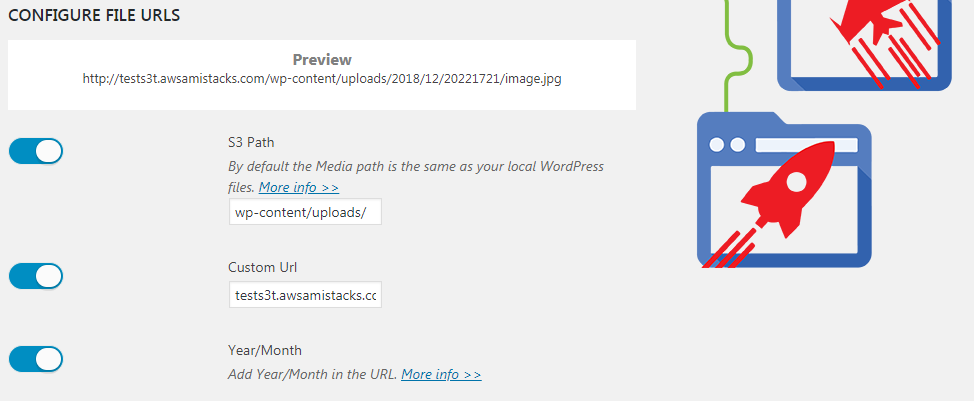
Clean and Dirty URLs
If you want to have a URL that looks like this, then go with the default options and with year/month ON:
https://s3ralpha.amistacx.io/wp-content/uploads/2020/01/aMi28014247/amistacx-modules-for-magento-and-wordpress-min.png
If you want to clean-up your URL, leave the path field blank, and keep year/month OFF.
https://amistacx.io/wp-content/uploads/2020/01/amistacx-modules-for-magento-and-wordpress-min.png
Note: Local storage is preserved; however, on S3 everything will be in the bucket root in a flat structure.
ADVANCED OPTIONS
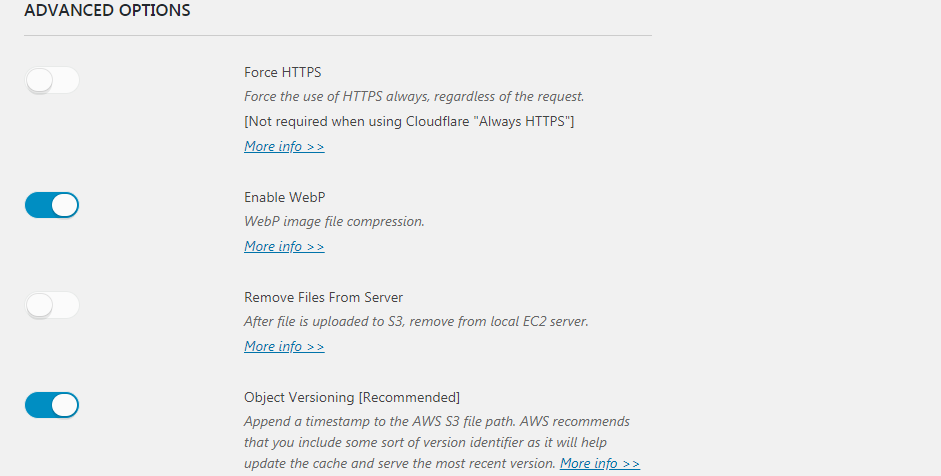
You really do not need to force HTTPS, because you followed the stack instructions and are using “Always HTTPS” on Cloudflare. [Better to have Cloudflare handle it at the DNS level.]
Object versioning is not required, but there as an option if you run into issues.
Another advanced option is WebP image compression, and we recommend you make use of it. Please see our WebP article for more details.
Roll-Back to Local
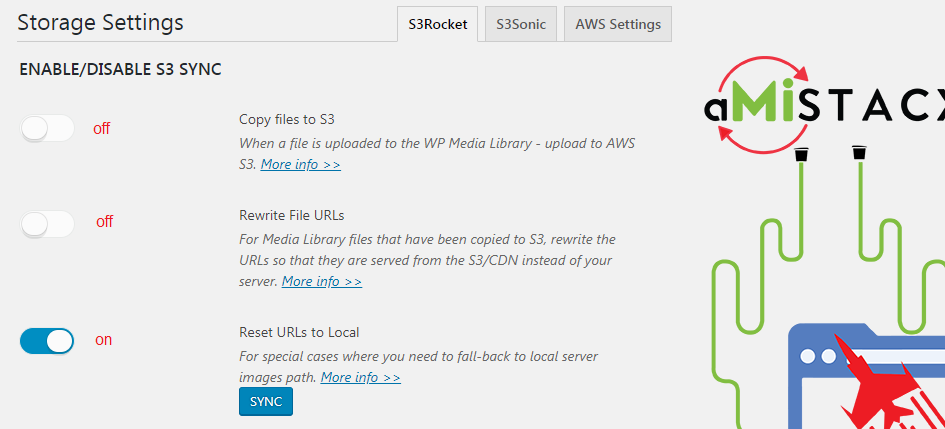
In the situation where you need to roll-back to having local server in order to serve media files; as of v1.1.3 you now have this option. You must set the first two top switches to off, and the third switch [Reset URLs to Local] to On. Save settings, then use the [SYNC] button.
Important! Please test everything on your Development Server First, and make a full backup of Production before you proceed.
Advanced S3 Bucket Security Configuration

When switched ON, you can prevent hot-linking, or access to the direct S3 bucket content raw URL as we set a bucket policy allowing only the IP or specified URL access.
S3T Versions
1.3.4 January 24th, 2021 : S3 Bucket Enhanced Security
S3Sonic TAB
S3Sonic will allow the spawning of AWS RDS MySQL read replicas. You may want to consider this option when database requirements are very high, or sites that require High Availability. Should the main db crash, then the RR will continue read operations, and you can promote it as primary. Again, this is beyond the scope of this simple how-to-do.
Overall an RR will increase throughput and offer high availability; however, make sure you test in development prior to deployment to a production ecommerce site.
S3Sonic Configuration on AWS
Troubleshooting
In situations where you may have deleted some S3 Titanium files for S3R-Alpha or S3Sonic:
1. You need the aMiSTACX S3-Titanium plugin.
/var/www/wordpress/wp-content/plugins/amistacx-wp-s3-titanium
2. You need this line in wp-config.php
define('WP_TEMP_DIR', dirname(__FILE__) . '/wp-content/temp/');
3. You need the temp directory named in the above. If missing create it.
/var/www/wordpress/wp-content/temp/
4. In root of wordpress you need this file:
db-config.json #Used for S3Sonic; can be blank {} if not using S3Sonic.
5. The /etc/crontab has a job for webp:
# WordPress aMiSTACX*/1 * * * * root wget -O - http://127.0.0.1/wp/wp-cron.php >/dev/null 2>&1
#
6. Reset permissions to baseline if you made any alterations:
sudo chown -R www-data:www-data /var/www/wordpress
Weaponize your Business with aMiSTACX!