Important! Make sure you have the latest WinSCP and Putty clients; otherwise, Ubuntu 22 will flag an SSH key error. Post upgrade you will also need to flush the session cache using the client’s tools. You can validate your keys with the AWS SSH connect.
Note: We do NOT support SFTP client FileZilla for Ubuntu Linux, because it requires altering the default ubuntu user permissions.
Note: We cannot recommend a Mac SFTP client as there is NO WinSCP port for Mac.
Note: For AWS quick PPK key file creation, see this post.
WinSCP is a powerful and flexible SFTP client, and provides a very convenient GUI interface for our Ubuntu aMiSTACX AWS EC2 servers. You can set file permissions, do file transfers, and so much more!
However, a standard configuration omits the ability to elevate to sudoer level access. In order to allow this elevated privilege, you’ll need to configure the WinSCP client as follows:
Part I – The Basics
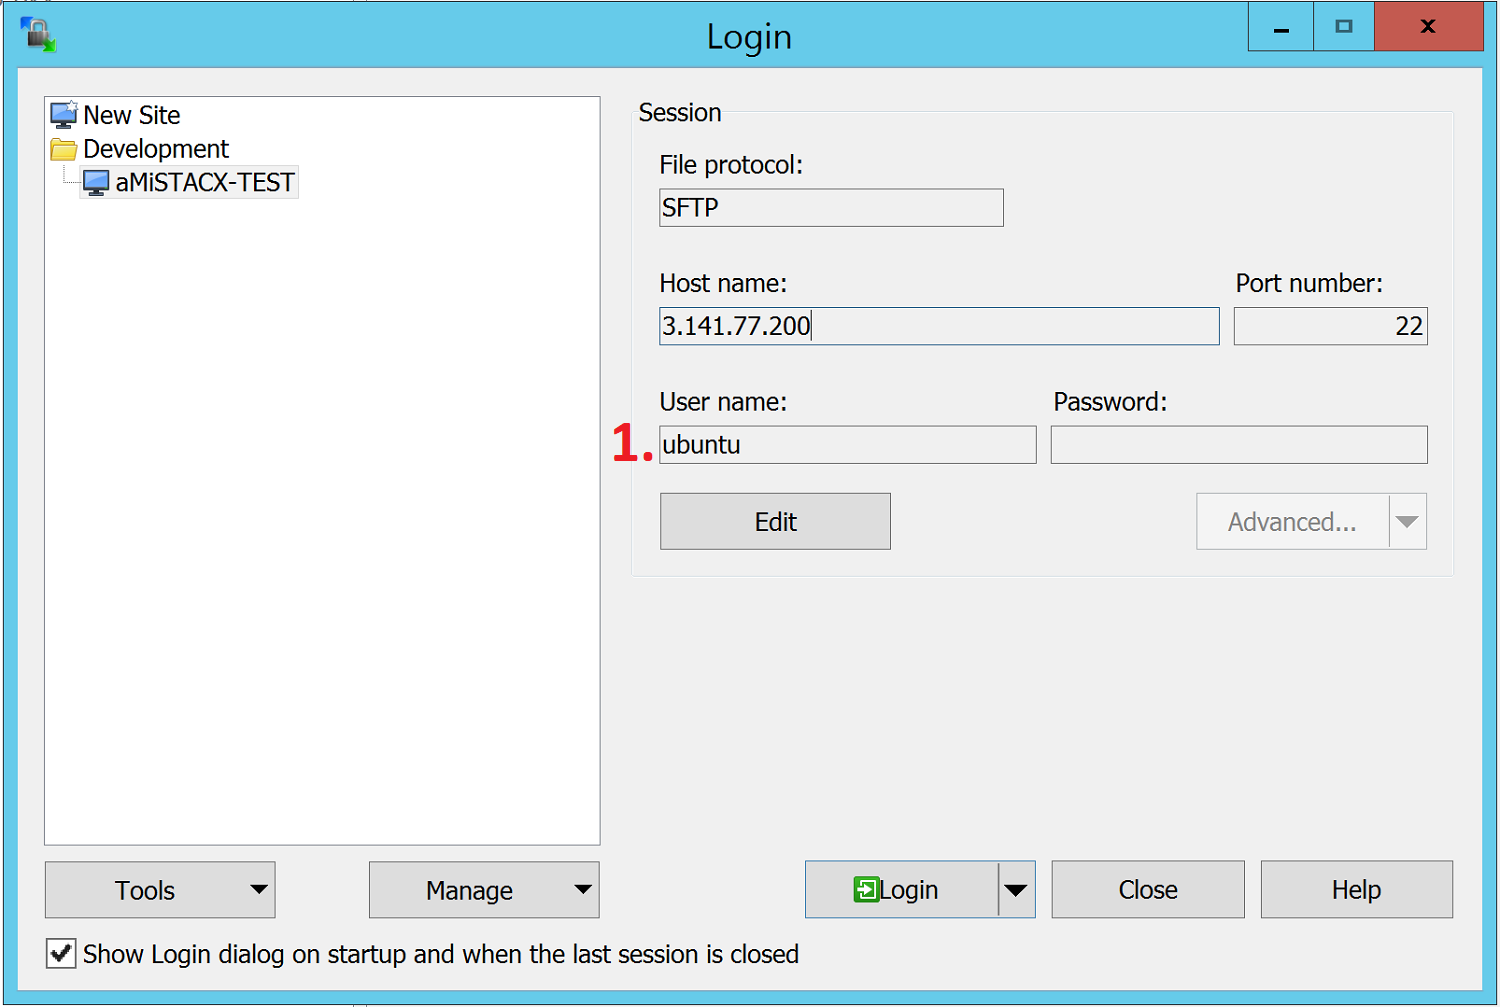
Step 1. Set username to ubuntu [Shown in image one.]
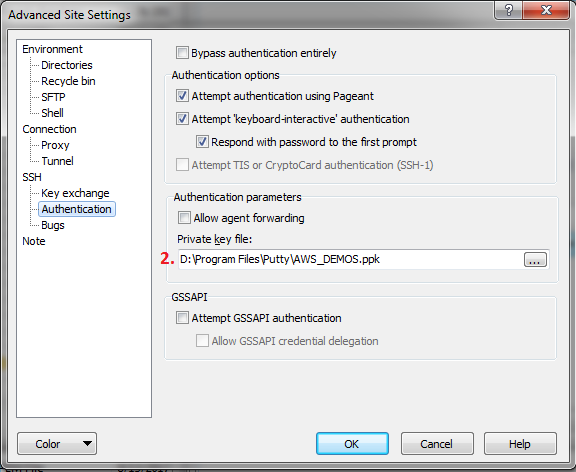
Step 2. Under Advanced Settings > SSH > Authentication, set path to your PPK file. This PPK file is derived from your PEM file on AWS using PUTTYGEN.exe
Part II – Sudo Access
Step 1. Go to WinSCP Advanced settings. [Shown in image one.]
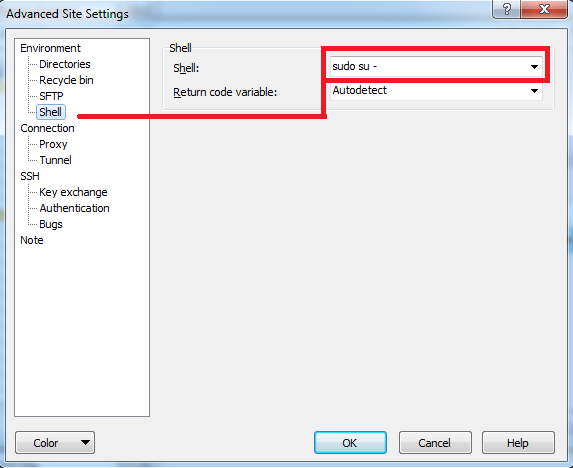
Step 2. Under Advanced Settings > Environment > Shell, select sudo su – from the drop-down menu.
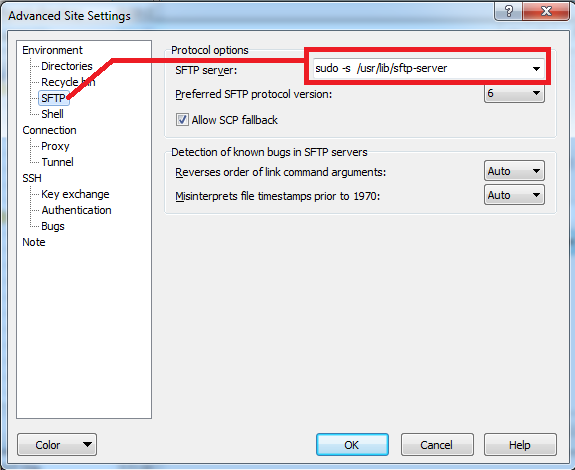
Step 3. Under Advanced Settings > Environment > SFTP, copy and paste this line to the SFTP Server Field:
sudo -s /usr/lib/sftp-server
Step 4. Click Save
You are now finished, and can see and access ALL of your files with sudoer level access.
More Useful WinSCP Tips!
How to show hidden files in sessions:
Step 1. Connect to a LIVE session
Step 2. In the WinSCP Top Menu select Options >> Preferences
Step 3. In the Left-Hand menu select “Panels”
Step 4. Check the box Show Hidden Files
Step 5. Select “OK” to close the dialog box.

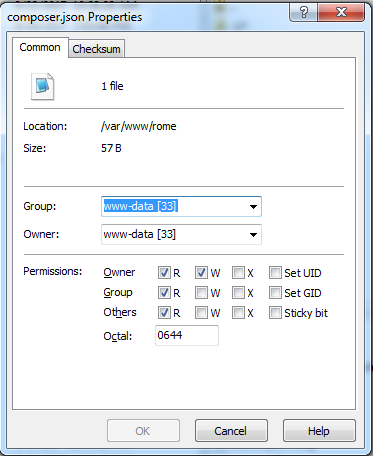
Another cool useful feature – Permissions!
Right-clicking any file and select Properties will bring up an input box where you can set Linux file and folder permissions, push them down to sub-directories, and change user and group.
How cool is that? An extremely useful feature.
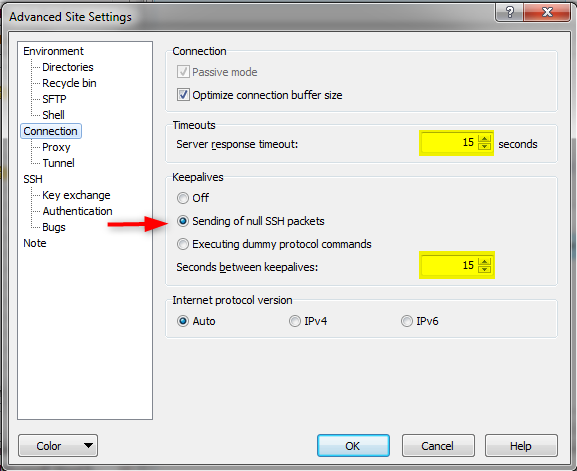
Even More useful connection tips – Keepalives!
If you are in the situation where your WinSCP connection is constantly getting dropped, a useful option is to initiate keepalives.
Bonus Time Saver! Access Putty on-the-fly
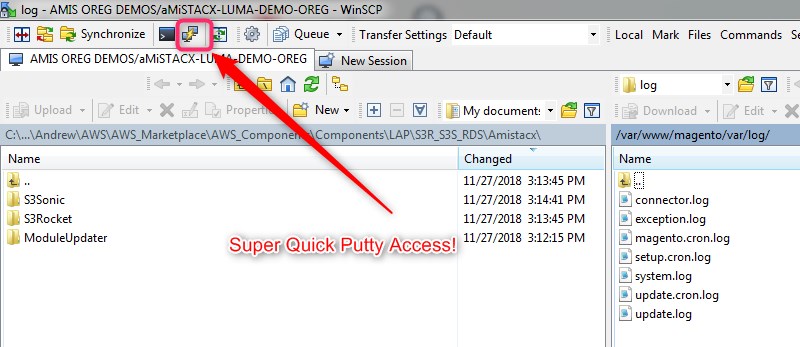
This is an awesome feature and will save you a lot of time. Add putty to the correct system path will allow you to launch from within a WinSCP session, and without having to configure additional connection parameters as WinSCP passes it all to Putty 🙂
Security Groups
You’ll need to make sure WinSCP and Putty have access to port 22. Here is a quick link SG tutorial on how to do it.